In previous post we installed Elasticsearch (ES), Kibana, and Elasticsearch-head (ES-head) plugin. In this post we are going to explore them in some detail.
What we are going to do:
- Use Kibana DevTools to add/index data to an ES index.
- Use Kibana to visualize the data.
- Use ES-head to index and query data, and learn about structured querying functionality.
Before we begin make sure you have started ES, Kibana, and ES-head.
Starting ES: cd to your ES folder and run ./elasticsearch on command line. Navigate to localhost:9200 to make sure ES is up.
Starting Kibana: cd to your Kibana folder and run ./kibana on command line. Navigate to localhost:5601 to check if Kibana started fine.
Starting ES-head: cd to your ES-head folder and run npm run start on command line. You can navigate to localhost:9100 to access plugin’s web UI.
1. Adding data using Kibana
1. Now we can add some data. In MySQL data is stored in form of rows in a table. In ES data is stored in form of documents under an index. There is also a concept of type, it can be considered as defining a schema for the underlying document.
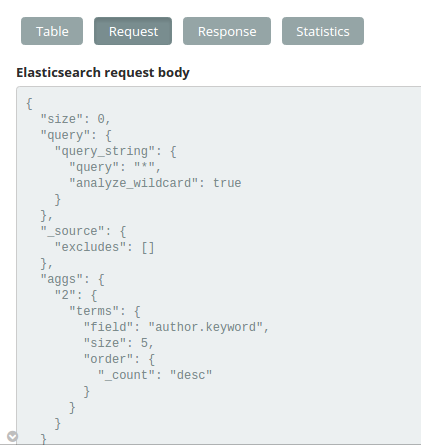
2. The easiest way to create an index (and store some data) is to use Kibana’s Dev Tools. So go to Dev Tools page (if this is the first time you are visiting the Dev Tools page you won’t see the Console directly, just click on ‘Get to work’ and Console will show up), and enter the following command in left pane of Console. Once you are done click on the little green arrow button (next to the wrench icon) to run the commands. ES should greet you with a successful result in the right pane.
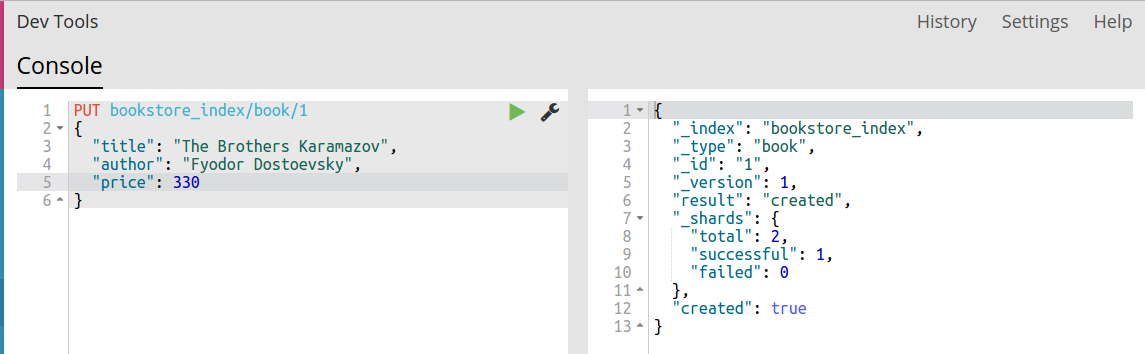
3. Congrats, we just indexed our first document! This can be loosely considered the equivalent of SQL INSERT command, you can find more details about indexing here. Now, go ahead and add another one. Don’t forget to change the id.
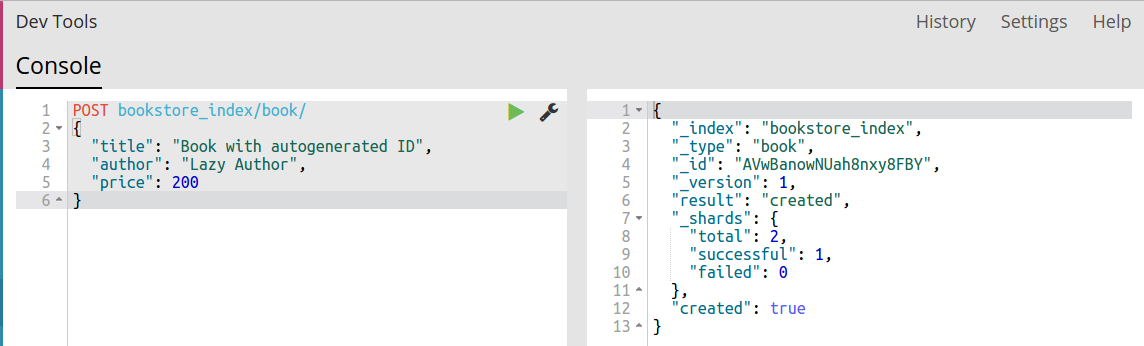
4. If you are feeling lazy, you can omit the id, but you’ll have to make one change to the query. Change PUT to POST, and you are good to go. ES will auto-generate the ID for you, as shown in following image.
5. Now we have 3 documents in our ES index. This is the perfect time to ‘Discover’ our data. To do that, click on the… you guessed it… Discover link on the left hand sidebar. You will see something like the following.

6. Kibana is complaining that you have not configured an index pattern. Which simply means it doesn’t know what data you want to discover, and where that data exists. We can easily fix this.
7. First, uncheck the ‘time events’ checkbox since we don’t have any time-related field in our example data. Then type, ‘bookstore_index’ in the text box, the button will change to ‘Create’ as shown below.
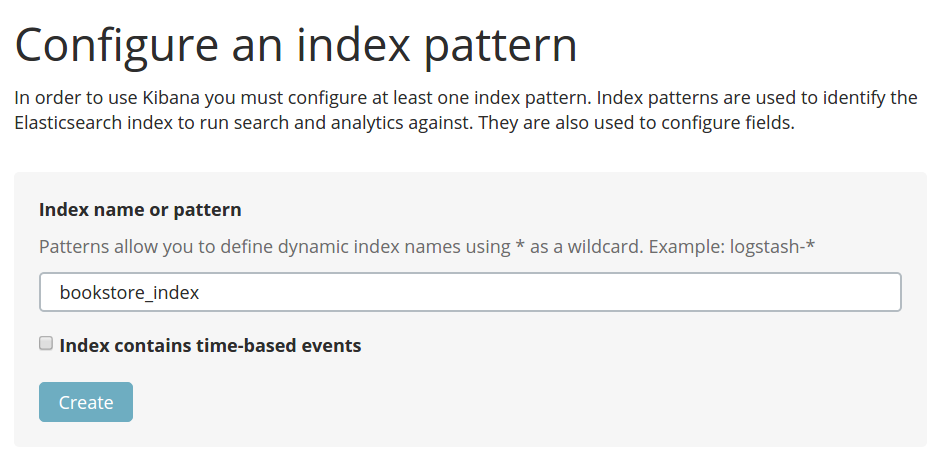
Click on the button. And you will see a page like this.
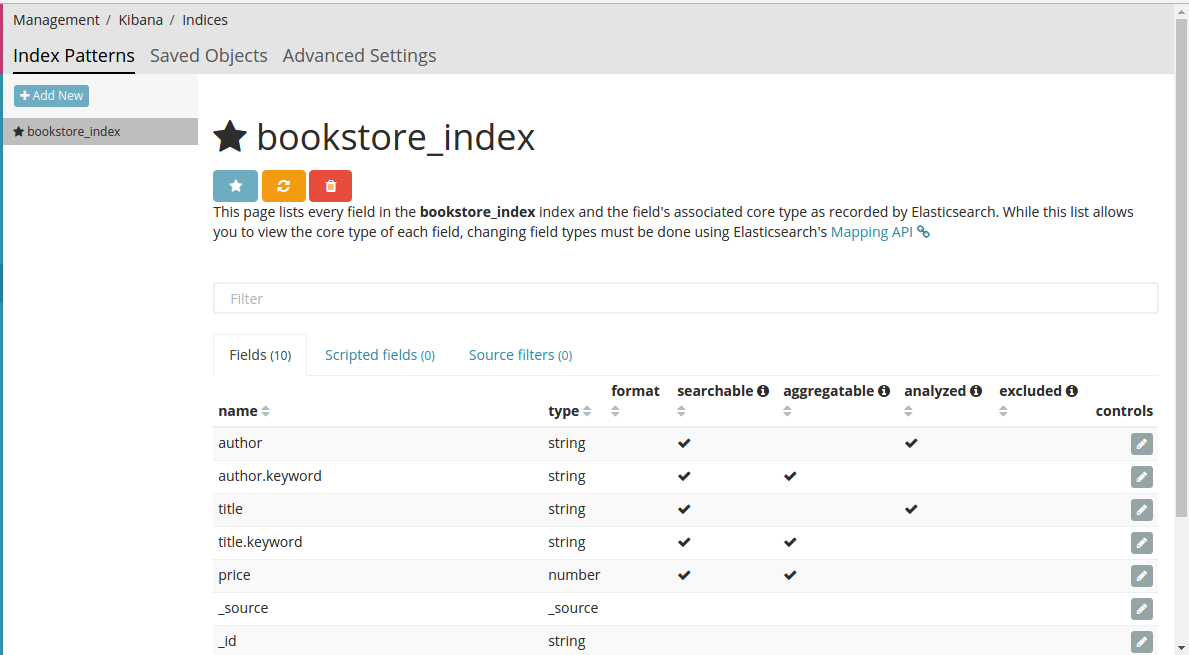
8. Take a moment to explore the details the page is showing. Specially, the important tick boxes beside our data items.
12. That’s the difference between the old fashioned SQL INSERT and ES Index. Indexing a document instantly makes it searchable (among other things).
13. Now, when you click on discover again, you can see the three records we indexed. So far so good.
2. Using Kibana to visualize data
1. Click on ‘Visualize’ link on the left hand sidebar. You will see something like this. Since we don’t have any visualizations.

2. Click on ‘Create a visualization’. In the window that follows, scroll down to bottom and select ‘Vertical Bar chart’. In next window select ‘From new search’, then select index, click on bookstore_index. Now we are set to create a visualization for our bookstore_index.
3. Let’s say we want a graph that shows how many books we have by an author against the author name. We do this as follows:
- Make sure metric on Y-axis is ‘Count’.
- Under “select buckets type” click X-axis.
- In the aggregation drop down select ‘terms’.
- In the field drop down, that becomes visible, select ‘author.keyword’. leave everything else as it is.
Your window should look like this. Click on the little Play button to see the results of visualization. (I added more books to get a better-looking visualization, your results might vary.)

That’s it. You have created your first visualization. You can also save the visualization and it will be automatically updated to reflect the changes in data. No need to write SQL queries, parse the data and then show results on a separate BI. In case you have been working with SQL. We have implemented the ES equivalent of the following SQL query.
[code language=”sql”]SELECT count(*), author FROM bookstore_index GROUP BY author[/code]
So what IS the ES equivalent? Kibana tells all. Click on the not-at-all conspicuous Up arrow button in the bottom left and click on ‘Request’. This will give you the ES query.
3. Using ES-head
Adding data:
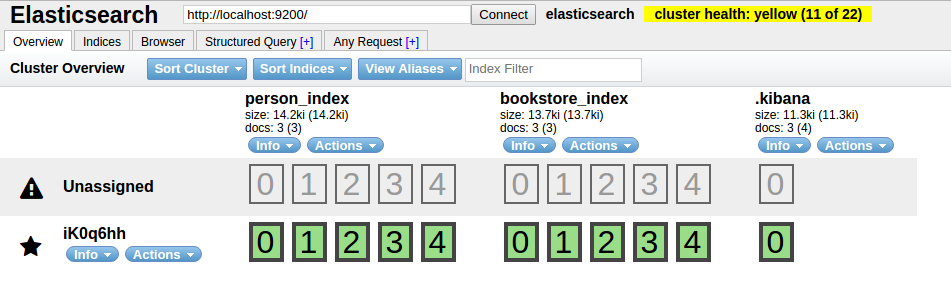
Make sure es-head plugin is running. Refresh the webpage, bookstore_index should appear.
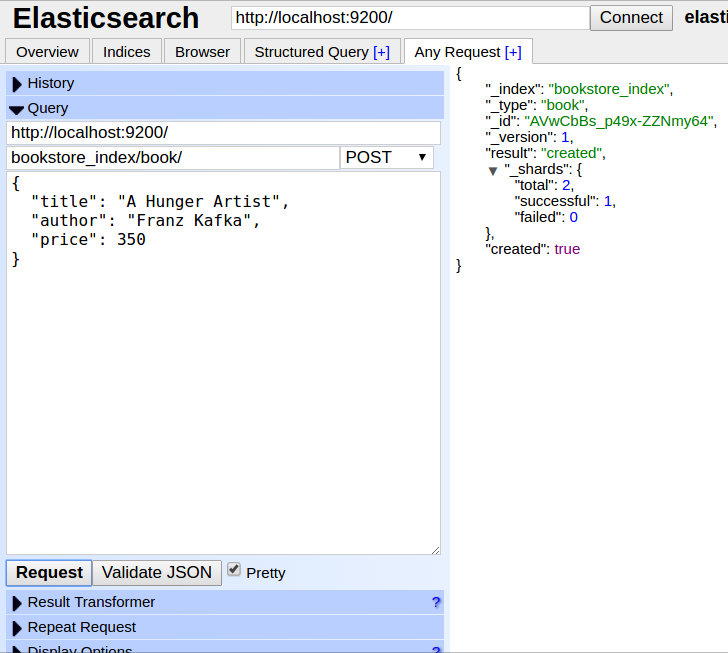
Now click on Any Query tab. This tab allows you to run your queries against ES cluster.
Since, we want to add/index a new document, proceed as follows:
- Make sure you select POST.
- Write your query (i.e INSERT query).
- Check the ‘Pretty’ checkbox and click ‘Validate JSON’. This will tell you whether your JSON syntax is correct or not and will format the JSON in a nice way.
- Assuming there are no errors, click on the Request button.
- If all goes well, you should see the response in right column.. much like the Kibana Dev tools.
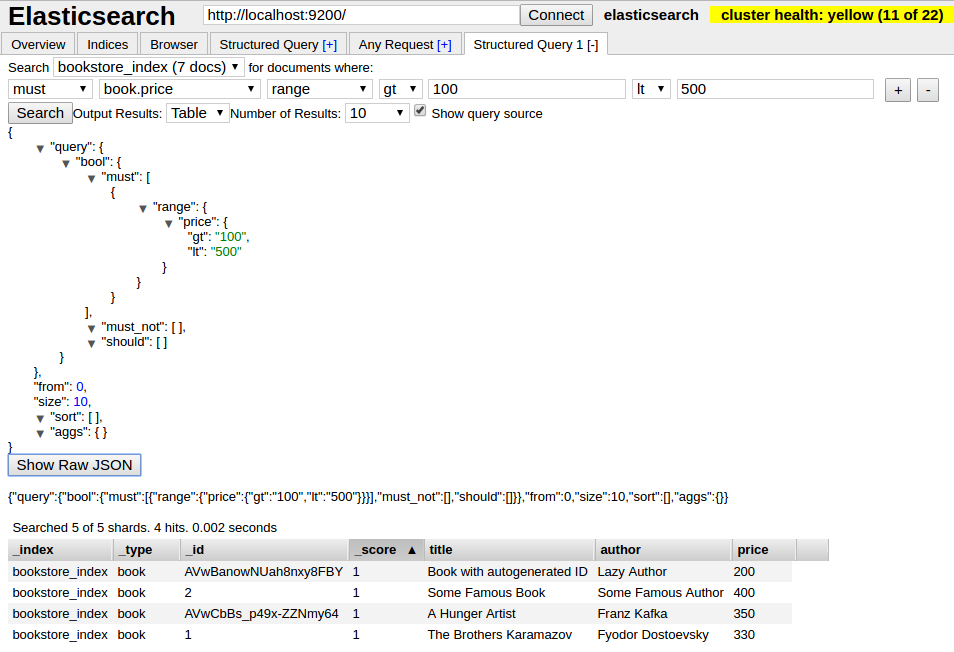
Using structured query:
This is my favorite feature of the plugin. When you click on Structured Query tab you will be presented with the following window.
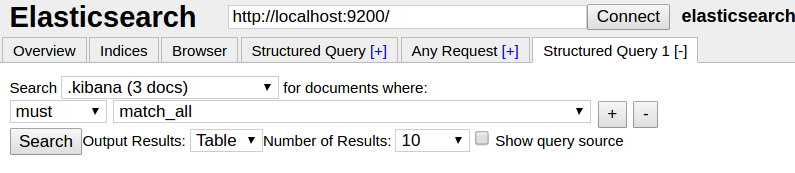
Select bookstore_index form the drop down. And create your structured query as follows:
- Make sure you select ‘Table’ in Output Results drop down.
- Check ‘Show query source’ checkbox.
- Hit the search button.
- Es-head will query the ES database for you and will present results in a nice tabulated format.
The best thing is you can also see the query it has generated. This can be a valuable learning tool.
Conclusion
In this post we took a first look at Kibana, used it to add and visualize some data. We also interacted with ES-head plugin and saw how it can be a useful tool when working with ES. But chances are, you won’t be using a UI to interact with ES, you will use some API or SDK to integrate your application with ES and it will be the application’s job to do indexing, searching, and querying on your behalf. That’s why in the next post we will take a more programmatic approach and explore ES Python API.
Be First to Comment