Installing Elasticsearch
- Download 5.3.0 release (latest at the time of writing) from website and unpack to folder named elasticsearch
- cd elasticsearch/bin
- ./elasticsearch (this should start the elasticsearch server). By default ES will reserve 2GB of memory for the process. If you are low on RAM you can change -Xms2g and -Xmx2g to -Xms1g and -Xmx1g respectively in elasticsearch/config/jvm.options file.
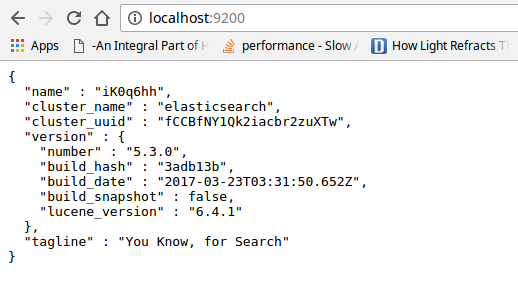
- You can verify by visiting http://localhost:9200/. This will return a JSON objet with Elasticsearch’s tagline “You know, for Search”.
- Add elasticsearch/bin to your PATH for future use.
Installing Kibana
Kibana is a powerful tool which makes visualizing data stored in Elasticsearch a breeze. You can rapidly create many different kinds of visualizations (area charts, bar graphs, scatter plots etc.) just by selecting options from drop-downs. Visualizations can be combined with query and time based filters which can help with reporting applications. It also provides functionality to create dashboards that update automatically as data in the underlying Elasticsearch instance changes.
- Download a compatible version (e.g. 5.3.0) of Kibana from website.
- Unpack to a folder named kibana
- cd kibana/bin
- ./kibana (this should start kibana, and print some messages to console)
- Head to http://localhost:5601/ from any browser.
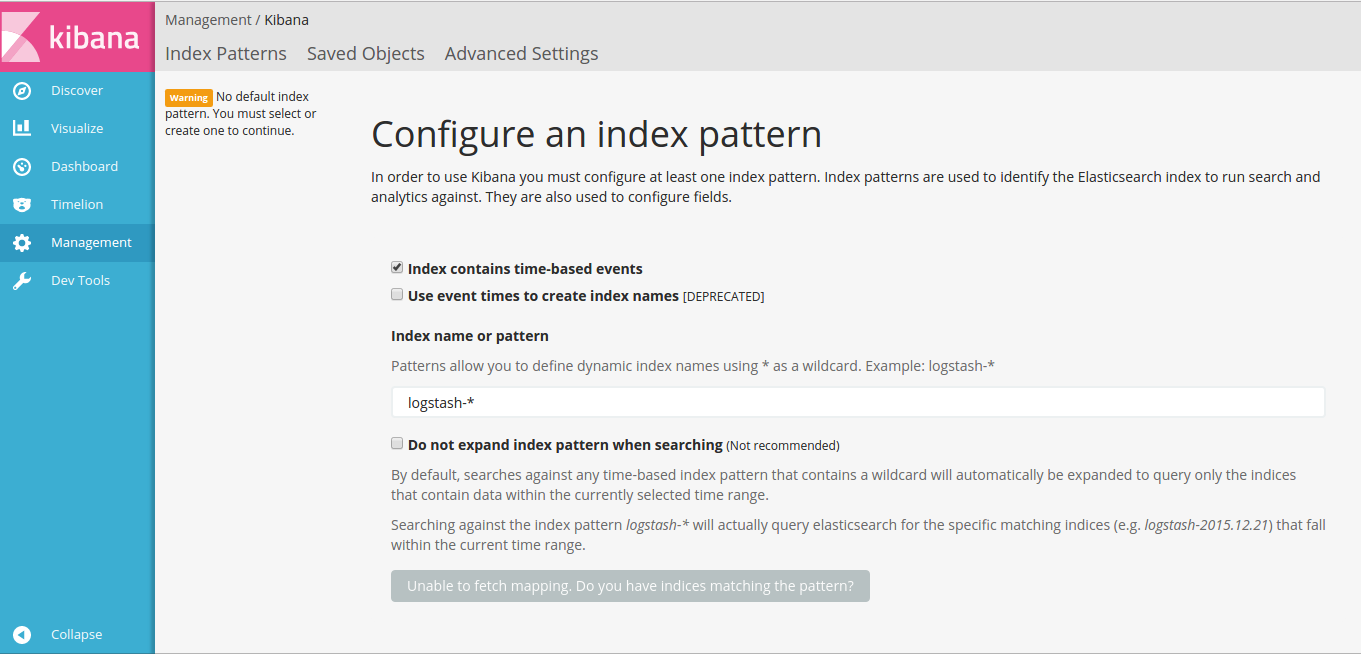
- If all worked fine you should see the Kibana UI.
- Kibana will show a warning message that no default index has been configured. Don’t worry about that. It is not important for the setup.
Install Elasticsearch-head plugin
This plugin provides some really nice features: structured queries, exporting results to CSV, and making requests directly by submitting JSON queries. It can used as a great learning tool as you can see the queries generated by the tool as well.
- Go to http://mobz.github.io/elasticsearch-head/ to know about the project.
- Go to https://github.com/mobz/elasticsearch-head
- Do the usual git clone git://github.com/mobz/elasticsearch-head.git
- Assuming you cloned to elasticsearch-head
- Move to the folder you cloned into. cd elasticsearch-head
- For the next step we need NodeJS and npm. You can also download Node.js from here (which includes npm) and after extracting add its bin directory to PATH (this method gives you npm and node.js in one download. For my environment relevant version to download is Linux Binary x64.
- Do npm install in the plugin directory. (If npm install fails because it is unable to download some phantomJS dependency, you can download the dependency manually from here and after downloading unpack to phantom-js and add the phantom-js/bin directory to PATH.
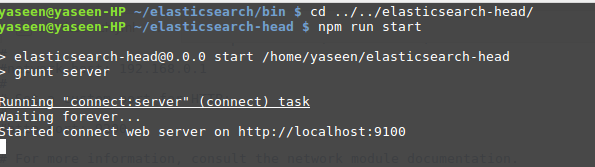
- Now onto last step. Run npm run start. If all goes well, you should see something like the following image in console. (Note: In earlier versions of the plugin the command to run plugin was grunt server. If this command fails you can install grunt manually by doing: npm install -g grunt-cli and then run command grunt server in plugin directory.)
Configuring the plugin
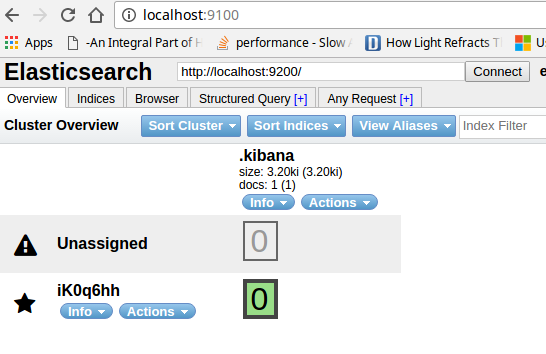
- First, head to http://localhost:9100/ to be greeted by plugin’s web UI
- There is one problem though, it won’t be able to connect with your ES node yet. You can see this is the case because plugin’s UI is showing message: “cluster health: not connected”

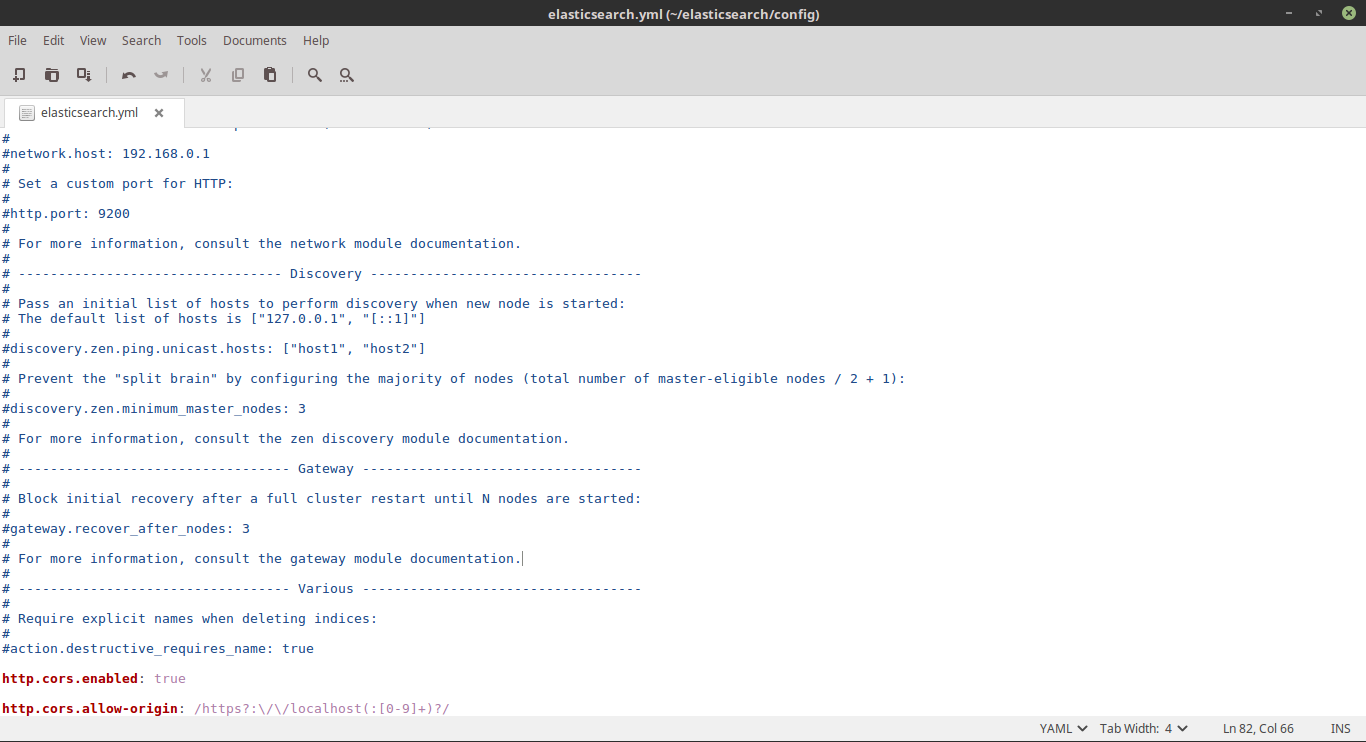
- Go to elasticsearch/conf folder and open elasticsearch.yml file
- Add the following two lines at the end of file as shown in screenshot.
http.cors.enabled: true
http.cors.allow-origin: /https?:\/\/localhost(:[0-9]+)?/
More info about this change here: (elastic.co/guide/en/elasticsearch/reference/current/modules-http.html).
This will tell ES to allow requests from localhost and also allow cross origin requests. Save elasticsearch.yml file and restart elasticsearch (Ctrl-C and then ./elasticsearch). After this refresh the plugin page and hit connect (if not connected already; plugin should auto connect). You should see the following screen. Plugin can now talk to ES!
Now your Elasticsearch is set up but there is no data in it, Kibana is also working but we haven’t really used it for anything. Same goes for the Head plugin. I intend to cover these in a future post.
[…] previous post we installed Elasticsearch (ES), Kibana, and Elasticsearch-head (ES-head) plugin. In this post we […]